
I don’t know why I didn’t take pictures, but I ran a semi successful test of the dehydrator. I used up stuff that I wasn’t going to be able to consume before it went bad mostly.
I had a mix of items. I was worried that the onions would flavor the fruits, once it started, because the whole house stunk of onions. It didn’t seem to though. Also, the noise isn’t too bad. It sounded a lot like the microwave in use; and aside from the fact I kept expecting the food in microwave to stop (hah), it wasn’t overly disruptive.
I made Kiwi chips. These are ok, but when we buy dehydrated kiwi, they are much thicker and a little chewier, and my kiddo prefers that to the thin ones I produced. I sliced them 1/4 inch thick on my V-Slicer, and they dehydrated down to a double thickness of cardstock.
I did some pineapple slices. I pulled them out a little chewy, but they are still thinner than my kid would like. I learned that if there is the tiniest bit of the skin left on, after its dried, the skin is VERY prevalent. It doesn’t shrink up like the flesh and … yuk. Bits that I didn’t even notice on the 1/4″ slices before drying made it inedible without trimming after drying.
I also had some chile peppers from my CSA box. Somehow I ended up with 2 bags with 6-8 peppers per bag. I am not even sure what they were. They were much longer than a jalapeno, and red. Not too spicy, but half my household doesn’t like food that is spicy at all. I didn’t roast and remove skin. And it seems like that is all there is too it once it dried. It’s all thickened basically inedible skin. They don’t have nearly as much flesh as a bell pepper, so I’m not sure I could even skin and de-seed them and leave anything else. They would likely be candidates for going very dry, whole, and then using like dried chiles in Mexican cooking, cooking in a liquidy dish to add a little spice and then removing, or possibly rehydrating, slitting open, removing seeds and trying to scrape some of the flesh out for adding heat to a dish. They aren’t good for storing as diced peppers, IMO.
Edit: Turns out they are Doux des Landes Chili Peppers, which are only about as hot as an Anaheim or Dried Pasilla Pepper. They come from the south of France and are often used in a Basque recipe pipérade, which is a stew like dish made of tomatoes and peppers, flavored with a pork product (Bayonne Ham is the traditional product, but pancetta is probably very close and more readily available here). Sometimes eggs are poached in it, like a shakshuka. It is also served over scrambled eggs, polenta, or poached chicken. Interestingly, I am having trouble finding an authentic recipe that actually calls for these chiles. Everything in English just says red bell peppers, which I suppose would be similar. I am straining my high school French lessons from 1000 years ago.
La piperade des Landes
LA piperade des Landes, la plus ressemblante à celle de mon arrière-grand-mère (cap-breton) :– 3 oignons
– 1.5 kg à 2 kg de tomates, bien mure de préférence.
– 5 – 10 piments vert et doux des Landes (on peu aussi y mettre d autres types, notamment des poivrons, mais c plus tout a fais pareil ^^)
– quelques morceaux de jambon de Bayonne, idéalement les morceaux trop dur et les “coin” avec le gras.
– huile d’olive
– sel, poivre, sucre.
– 3 – 4 gousse d’ail
– thym et laurier.
– un peu d’eau (ou vin blanc).Haché les oignons, les faire colorer dans de l’huile d’olive. Ajouter piments couper en rondelle et sans pépins, les tomates peler et couper en carré, les coins de jambon, le bouquet garni, l’ail, sel poivre et sucre à votre convenance, un peu d’eau.
Laisser mijoter 30 mn à 1h00 (plus c long, plus c bon). Il faut obtenir une sauce un peu épaisse.Servir avec des tranches de ventrèche ou jambons de Bayonne poêler. Vous pouvez pocher des œufs dedans.
I believe that this is a recipe for pipérade from the poster’s (Great?) grand mother. Onions, tomatoes, my chile peppers, hard and fatty corner pieces of Bayonne ham, Olive oil, salt, pepper, sugar, garlic, thyme and (Laurel? We don’t use that as a cooking thing here, and that’s my daughters name, heh), water or whine wine. The instructions are harder than the ingredients. Chop onions, sprinkle with the olive oil (I think in the pan?) and add the sliced peppers (in rounds?), peeled tomatoes (couper en carré? is that “cut into squares”? meaning diced?). Tie up the herbs in a bouquet garni, toss those in, season with salt pepper and sugar and then simmer 30 minutes to an hour until it gets thick. Serve over slices of “ventrèche” (a cured pork product like pancetta made from pork belly) or steam fried Bayonne Ham. Or poach eggs in it.
Well, that was a long interlude, oops 😉
I did some onions, both diced and in rings. These turned out just fine. I am going to give them a try in a recipe tonight and see how they are after rehydrating in a dish.
I also dried some citrus fruits. I had some lemons and mandarins. I will try grinding a few into powder to see how that goes. The rest I am using for holiday decorating.
All in all, a good first run of the dehydrator. I am excited about putting up larger batches of things for my LTS.
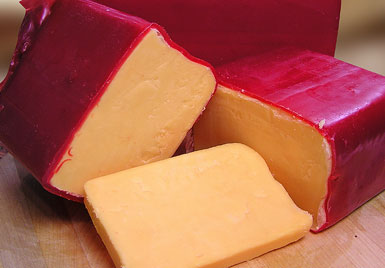 I have been doing research on waxing cheese for long term storage. From what I can gather from sources online, the best temperature for storing cheese in this fashion is between 40-55 degrees. My pantry was being used as a wine storage cupboard by the previous tenants, so they installed insulation on all the walls, and it stays cooler than the rest of the house, but it doesn’t stay that cool. Still, even at higher temperatures, waxing cheese is supposed to increase shelf life to 6 months to a year.
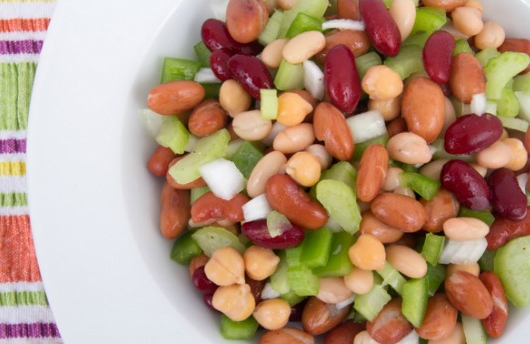 1 can garbanzo beans, drained